Attention all attorneys that help clients generate Wills, Power of Attorneys, and other legal documents that could easily be done by the clients themselves. Wouldn’t it be great if you could have a form on your website that would walk your client through the process of creating a Will?
Great news! With Formstack Documents and Formstack, you can build your own little RocketLawyer that walks your client through the entire process and at the end generates a nicely formatted document ready for review. For this article we’re going to show you how you can build a Do-It-Yourself Will that you can embed on your website.
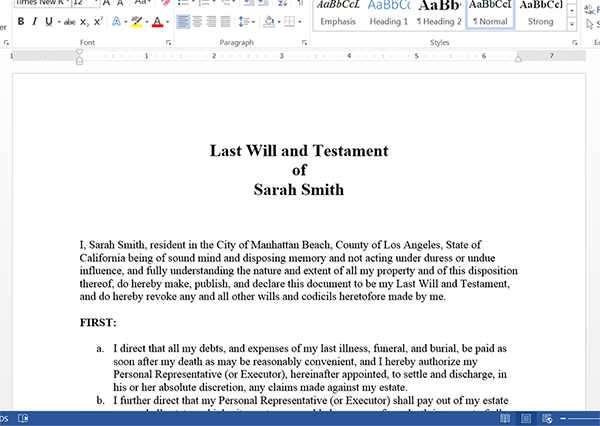
To get started, we’re going to setup our Will template in Formstack Documents. We’re going to use a Word document for the template so that we can generate and editable document (for later review). In our document, we’ll put the normal fields that all Wills contain like the name and address. Here’s an overview of what our Will looks like:
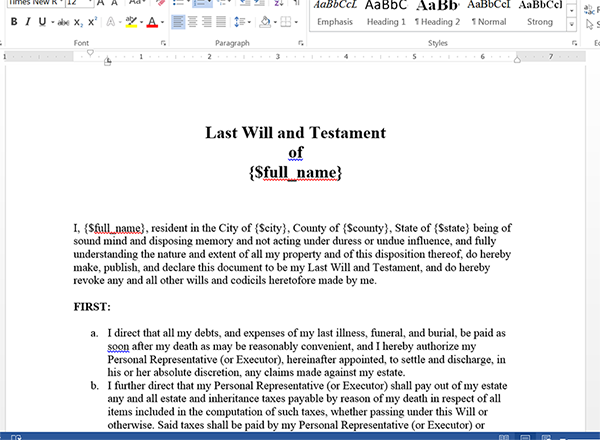
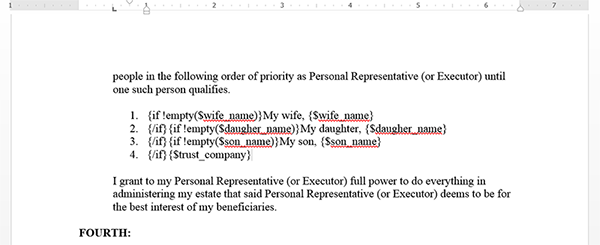
Now, with a Will you’re going to have a lot of conditional sections that are dependent on the way the client answers the questions. For example, they might not want to elect any Guardians or they might not have any children to include in the Will, so we want to hide those sections.
To handle these hidden sections, we’re going to use conditional if statements like these:
Now that we’ve got our Will setup, we’re going to upload that to Formstack Documents. Once we upload, we’re ready to jump over to Formstack to build the questionnaire for our clients to fill out.
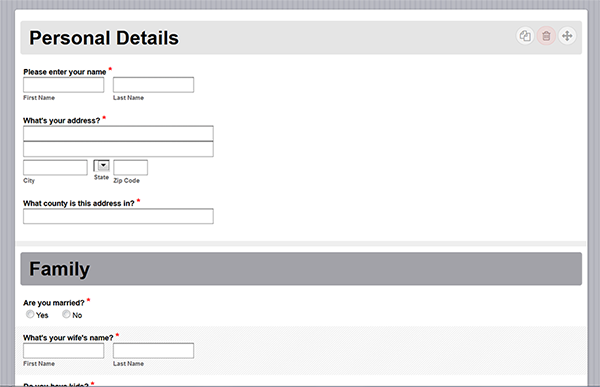
Inside Formstack, we’re going to setup a new form and add fields that are going to walk our client through the process. We can split up the form on to different pages so it’s easy to focus on the current questions without being overwhelmed.
Here’s what our form looks like:
Once we finish building our form, we need to setup the integration between Formstack and Formstack Documents so that the information submitted by the client is automatically sent to Formstack Documents and the Will is generated. To setup the integration, go to the Settings tab inside Formstack, and click Integration Hub. You’ll find Formstack Documents under the Documents category.
When you add the Formstack Documents integration to your form, it is going to ask you for your API Key and Secret. You can find (or create) your API Key inside Formstack Documents under Account > API Access. After you enter your API Key, it is going to load a list of the documents that you’ve setup in your Formstack Documents account. Go ahead and select the Will document.
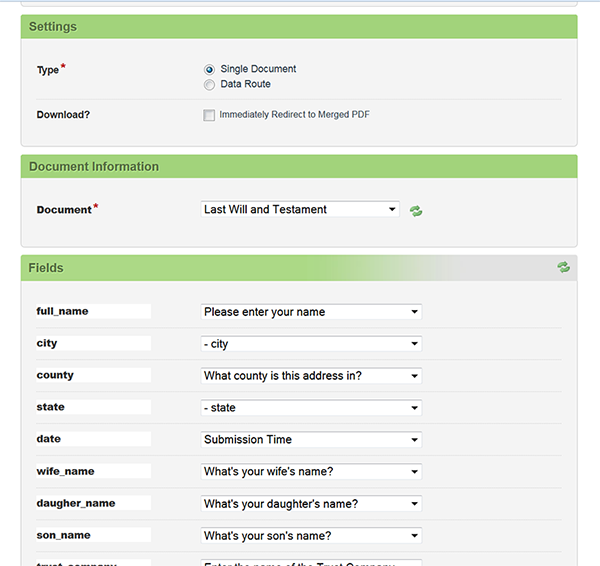
Once we select the Will document, it is going to load a list of the merge fields that we setup in our document. Next to each of these fields is a dropdown that has all the fields on your Formstack form. Go ahead and match up those form fields to the corresponding merge fields. This tells Formstack what field names to use when sending the data to Formstack Documents (so Formstack Documents knows where to put it in your document)
Here’s what the integration looks like:
Now that we’ve mapped all of the fields in the integration, we’re ready to turn on the integration and submit a test. Go ahead and fill out the form and once you hit submit, you should receive an email from Formstack Documents with the Will attached.
Here’s what our test looked like:
