There is a lot that goes into putting on a great event. But for the team behind the scenes, things can be stressful. If you’re planning an event and feeling a bit stressed about getting everything done, we’ve got a great way to update and automate one of your workflows: ticket generation. With Formstack Forms and Formstack Documents, you can simplify, automate, and personalize your process for making custom event tickets.
Today, we’re going to show you how to start using Formstack Forms and Formstack Documents as your custom ticket maker.
For the first step, you’ll need a template for your event ticket. Your template can be a PDF or Word document, but you’ll want to take some time to customize it with your organization’s logo, colors, and branding. You can use anything from Microsoft Word or PowerPoint to Adobe InDesign to create your template.
If you use PowerPoint or Word to create your template, make sure to add merge fields where you would like your data to automatically populate (i.e., {$name}, {$date}).
You might decide to use a free tool like Canva to create a PDF template. If you decide to use a PDF template, just make sure the final PDF is fillable so you can add form fields in the places where you want your data to automatically populate.
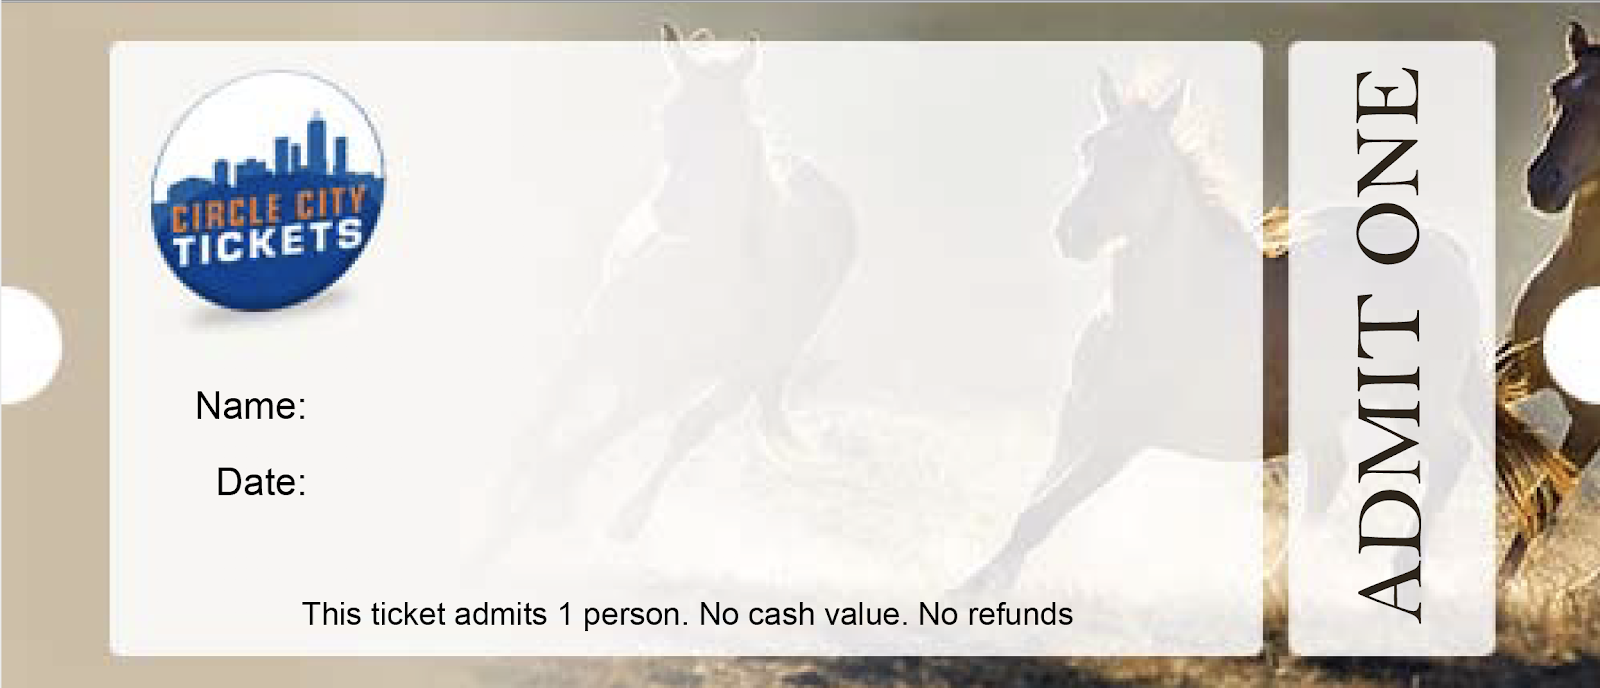
For this example, we’re going to use the event ticket template housed on our templates page, and the form fields have already been added. Here is what our final template looks like:
Once you’ve prepared your template, it’s time to upload it to Formstack Documents. To do this, navigate to the Documents page in Formstack Documents, click the New Document button, and title your document. Then, choose the document type that matches your template and upload the file from your computer.
After uploading your template, navigate to the Settings tab, where you can make modifications such as adding a name to the merged file. For this example, we’re going to include the attendee’s name in the name of the merged file.
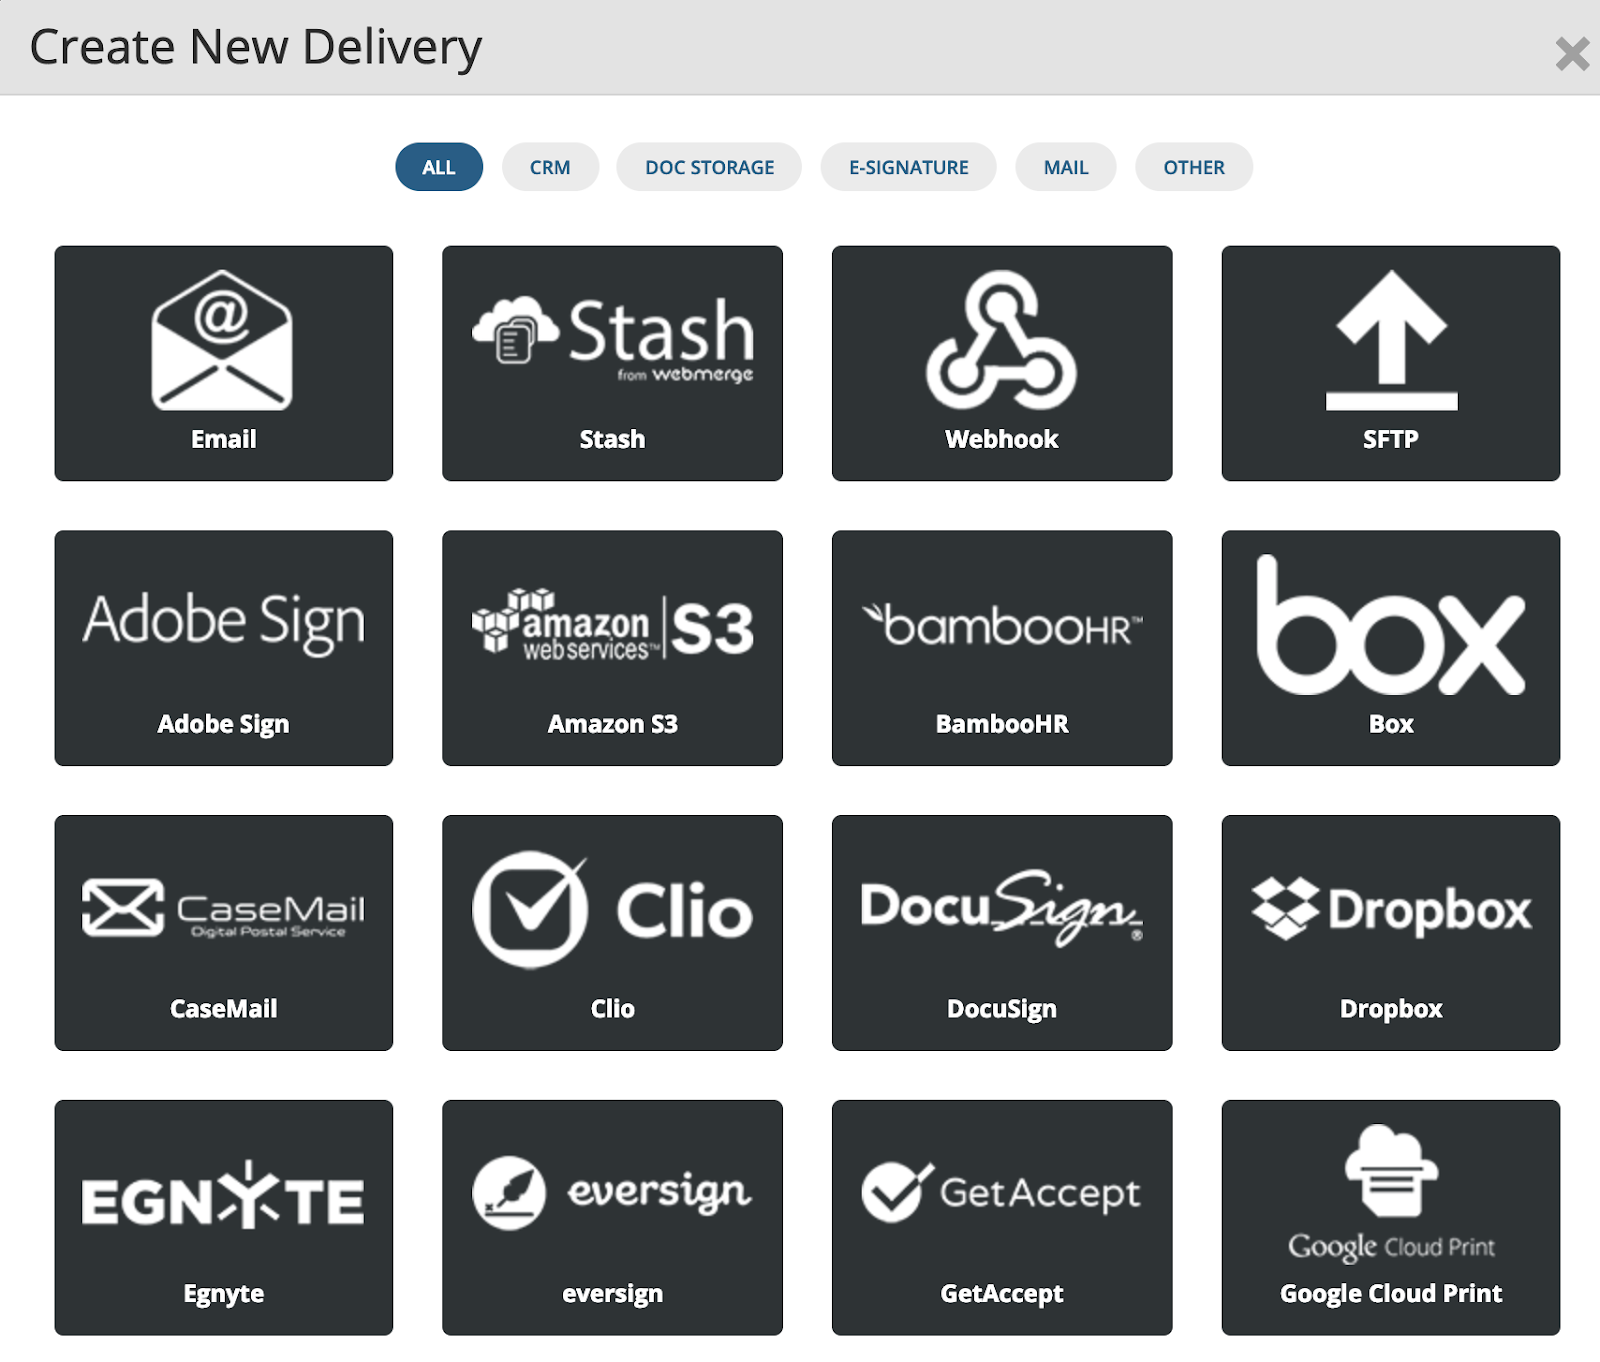
Now, attendees will automatically receive their event ticket via email after they sign up for your event. To prepare the email they’ll receive, navigate to the Deliver tab, select Create a New Delivery, and pick the email option.
On this screen, you can update where the email will be sent and write text in the body of your email. For this example, we’ve used merge fields to personalize the email for attendees.
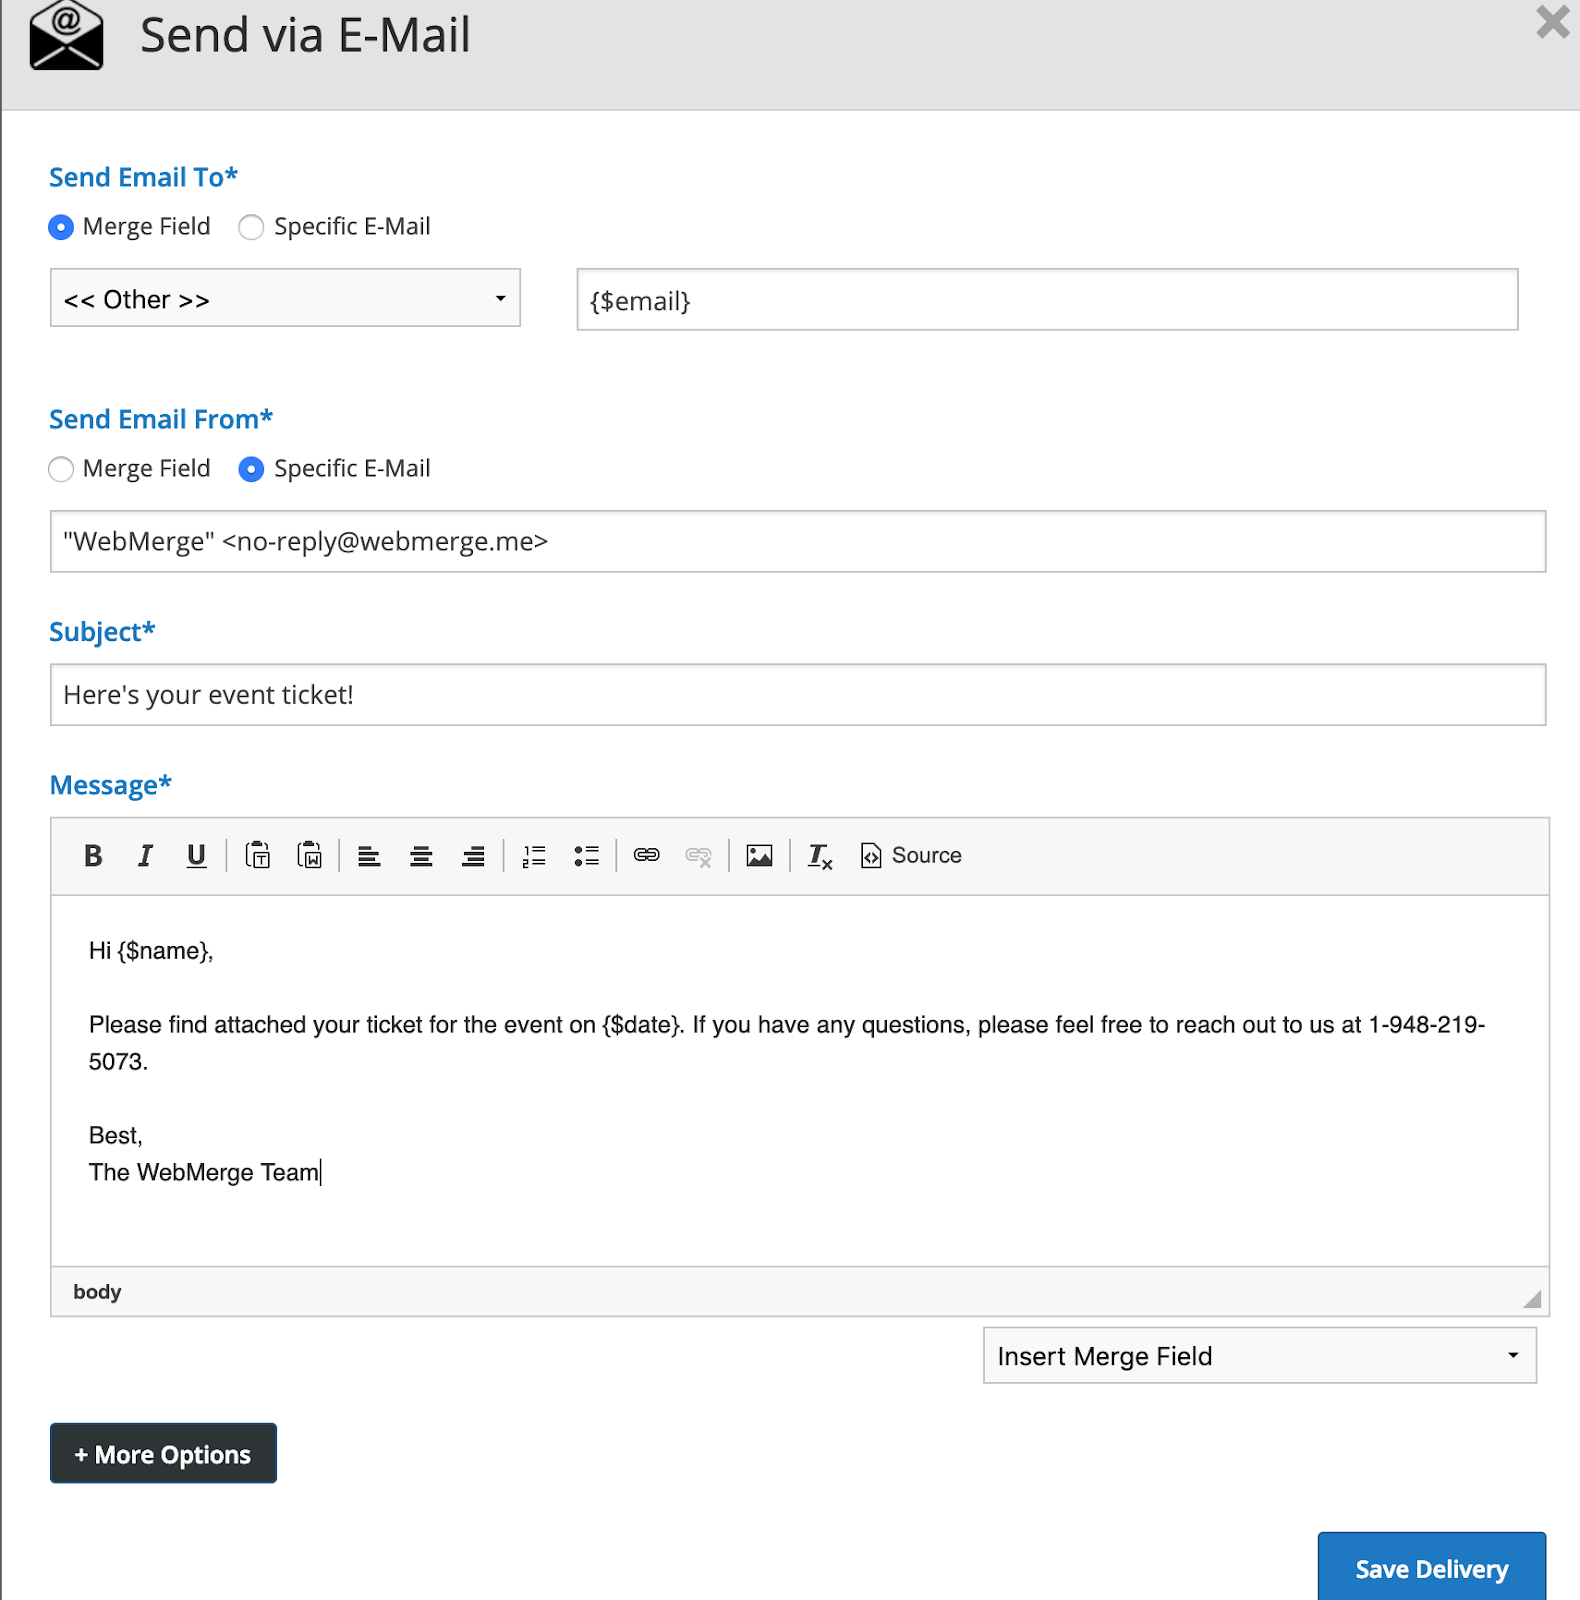
Once you’ve prepared your email delivery, you’re done with the setup process in Formstack Documents, and we’re ready to move on to the integration with Formstack.
Inside Formstack, find the registration form you want attendees to fill out and navigate to the Settings tab. There, you will select the Integrations from the navigation bar on the left-hand side of your screen. Scroll down to find Formstack Documents, select Add, and then select Settings. Now, the Formstack Documents integration has been added to your form.
After entering your Formstack Documents API Key and Secret (both of which can be created under Account > API Access inside Formstack Documents), Formstack will load a list of the documents in your Formstack Documents account. From here, you will select our Event Ticket.
Formstack will then load a list of possible merge fields into your document. For each merge field, you will need to select the corresponding form field from the dropdown menu. This will tell Formstack how to send the form data over to Formstack Documents to correctly populate the document.
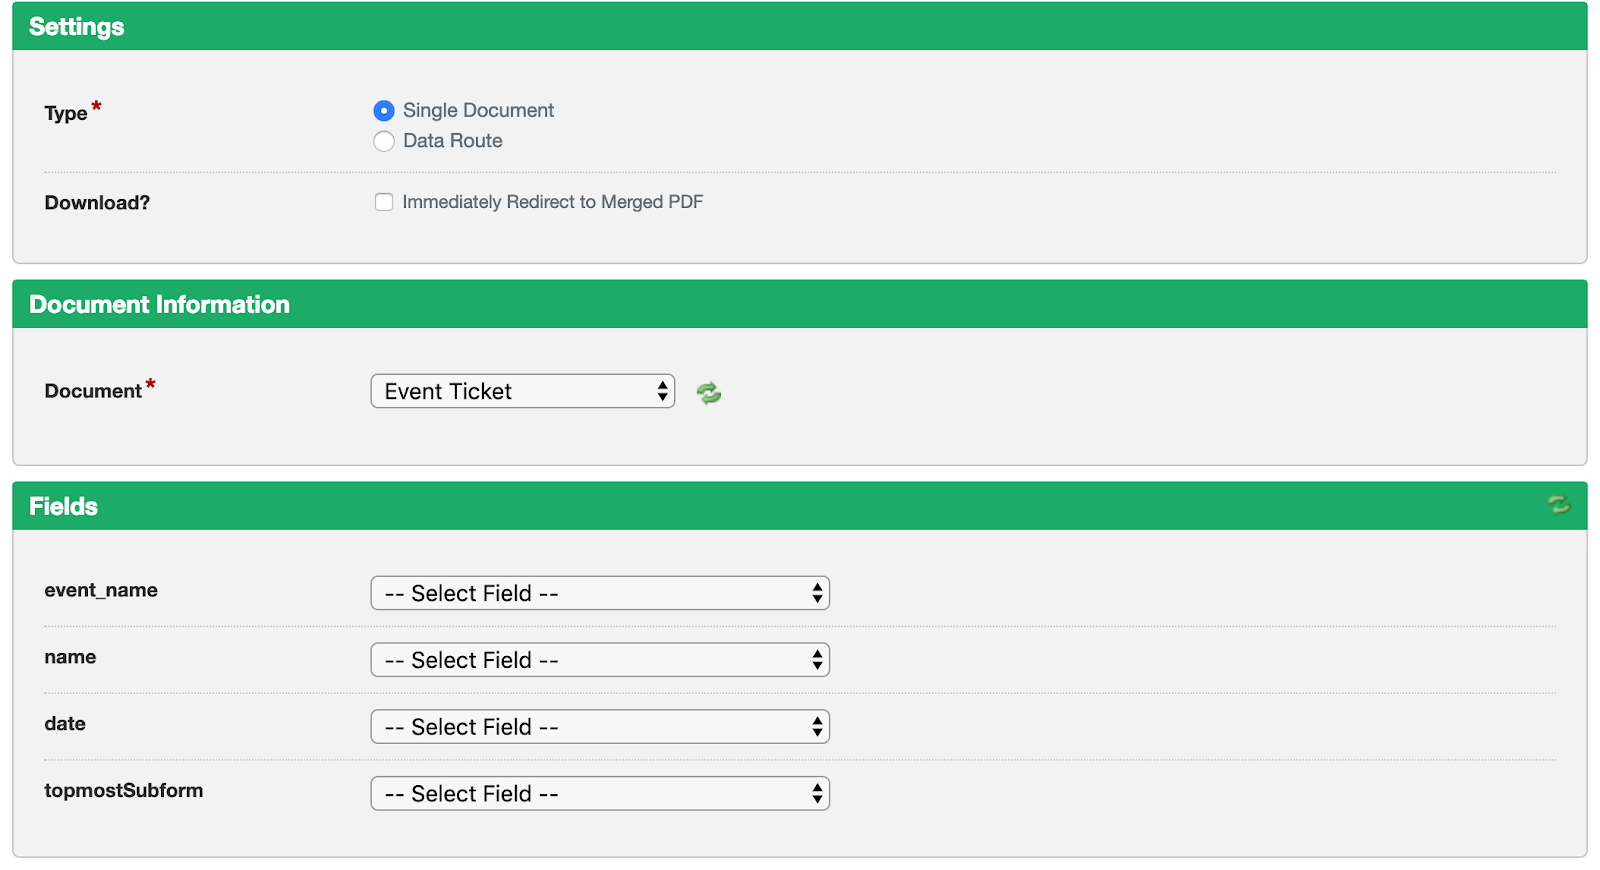
Once you have matched up all the fields in Formstack, the setup process is complete, and you’re ready to send your Formstack form out to attendees! When attendees submit their information, Formstack will send that data over to Formstack Documents, and Formstack Documents will automatically populate the PDF and send an email with the final document to your attendees.
Following the steps above, you can automatically populate data submitted via your Formstack forms into all kinds of documents. Check out the video below to learn more about leveling up your document generation process with Formstack Documents.


